Hi!
Today's Adventures in Stamping Sunday theme was summer nails, and I decided to go a bit beachy. I used to live in Cornwall and it was a few minutes drive in any direction to get to the most beautiful beaches, but now I'm pretty landlocked and I miss it. So what better way than to bring the beach to my nails! I used sooooooo many polishes for this manicure - starting with one coat of Barry Greenberry Gelly and then two of Seventeen Turquoise from their new Juicy Neon collection. To me, they don't seem very neon, but pretty summer polishes none the less. I then added a dabbed on coat of a blue glitter by Technic called Mermaid before letting that all dry with a coat of Poshe. The accent nail is Models Own Bora Bora and ELF Golden Goddess. Once that was ready I stamped seashells from Cheeky plate CH 38 in Konad white on the accent nail, and Barry M Gold Foil on the blue nails. In hinsight, I should have used white, or maybe blue, on the "sea" nails, as the stamping is hard to make out. I tehn added more Bora Bora and Golden Goddess to imitate sandy tips. It is really pretty, even though the stamping errs on the subtle side!
Pretty and sparkly summer nails!
I have a very exciting post scheduled for tomorrow morning, and you'll definitely want to check it out so see you soon!
Hx
Sunday, 1 June 2014
When I met you in the summer...
Labels:
adventures in stamping,
Barry M,
Blue,
cheeky,
elf,
glitter,
gold,
green,
Models Own,
seventeen,
stamping,
technic,
white
Saturday, 31 May 2014
Deja vu...but not in blue
Hi!
I loved my blinged up turquoise nails for last week's GOT polish challenge so much that when it came to chosing my nails for a night out last weekend I decided to recreate them - in a neon hue! The stamping-glitter-stud combo is cure to become a favourite this summer I think! This time I used Models Own beach bag from their polish for tans collection and while I love the colour the formula left a bit to be desired. This is three coats, which I don't mind in itself, but it was so thick I had to add thinner halfway through the second. I must admit I did my toes with it too, but I wouldn't expect a polish to go as gloopy as it did after only two uses, especially as I expect people buy these as their "summer" manicure colour (that is afterall what they're marketed as, no?) I often find this with Models Own, their colours totally knock my socks off, but the formula sometimes doesn't live up to that. I'll move on...! I used Models Own Bora Bora as the accent nail, and added studs from Born Pretty Store and stamping from the Pueen Buffet set with Barry M Gold Foil. Teamed with an LBD and my dancing shoes, and I was in cheesy disco heaven!
My camera freaked out a little bit at the colour, it really is that bright! I absolutely love it, no doubt about that, I just wish the formula was better. Have you picked up any MO polish for tans? I do think it's made my pasty sausage fingers look a bit more tanned!
Hx
I loved my blinged up turquoise nails for last week's GOT polish challenge so much that when it came to chosing my nails for a night out last weekend I decided to recreate them - in a neon hue! The stamping-glitter-stud combo is cure to become a favourite this summer I think! This time I used Models Own beach bag from their polish for tans collection and while I love the colour the formula left a bit to be desired. This is three coats, which I don't mind in itself, but it was so thick I had to add thinner halfway through the second. I must admit I did my toes with it too, but I wouldn't expect a polish to go as gloopy as it did after only two uses, especially as I expect people buy these as their "summer" manicure colour (that is afterall what they're marketed as, no?) I often find this with Models Own, their colours totally knock my socks off, but the formula sometimes doesn't live up to that. I'll move on...! I used Models Own Bora Bora as the accent nail, and added studs from Born Pretty Store and stamping from the Pueen Buffet set with Barry M Gold Foil. Teamed with an LBD and my dancing shoes, and I was in cheesy disco heaven!
My camera freaked out a little bit at the colour, it really is that bright! I absolutely love it, no doubt about that, I just wish the formula was better. Have you picked up any MO polish for tans? I do think it's made my pasty sausage fingers look a bit more tanned!
Hx
Labels:
Barry M,
barry m gold foil,
Born Pretty,
glitter,
gold,
Models Own,
neon,
pueen,
stamping,
studs
Friday, 30 May 2014
GOT Polish? Lilac!
Hi!
Guess who forgot to post their GOT polish mani yesterday? *Raises hand* So here it is, a wee bit late! I hope it was worth the wait, because I used an absolutely stunning polish here. Emily de Molly Simplicity is a lilac cream prolish stuffed with white matte glitters that just float perfectly in the crelly base. There's no fishing for glitters, no dragging, perfect opacity in two coats and it's smooth as glass just with one coat of topcoat (Poshe is my go-to). I teamed it with another Australian polish, but this time what I believe is a drugstore brand, Face of Australia Castle on a Cloud is a beautiful pale lilac with pretty shimmer. Another great two coater, and I topped it with some bubbly stamping to match the glitter in Simplicity and for a dreamy feel.
Worth the wait? I'm an idiot sometimes!
Hx
Guess who forgot to post their GOT polish mani yesterday? *Raises hand* So here it is, a wee bit late! I hope it was worth the wait, because I used an absolutely stunning polish here. Emily de Molly Simplicity is a lilac cream prolish stuffed with white matte glitters that just float perfectly in the crelly base. There's no fishing for glitters, no dragging, perfect opacity in two coats and it's smooth as glass just with one coat of topcoat (Poshe is my go-to). I teamed it with another Australian polish, but this time what I believe is a drugstore brand, Face of Australia Castle on a Cloud is a beautiful pale lilac with pretty shimmer. Another great two coater, and I topped it with some bubbly stamping to match the glitter in Simplicity and for a dreamy feel.
Worth the wait? I'm an idiot sometimes!
Hx
Labels:
emily de molly,
face of australia,
glitter,
Golden Oldie Thursday,
GOT polish,
lilac,
stamping,
white
Monday, 26 May 2014
Dotty Bows with MoYou Nails
Hi!
I was offered the change to try out some stamping plates and special polish from MoYou Nails, a UK nail art brand who offer stamping plates, special polishes and everything a nail art novice or expert, or anywhere in between, could ask for! They sent me plates 101 and 105, a stamper and scraper and their red special polish to try.
The plates I chose both have 6 small images on them - 101 has owls and eyes, and 105 has hearts and bows (we all know how I feel about owls! <3) The plates are round, come with a blue protective film to stop them getting scratched in transit, and a backing so the edges aren't sharp. The stamper is red and firm, and it worked straight out of the packet with just a wipe over with some acetone - no need to "prime". The scraper is plastic, which I prefer as it wont scratch the plate. All in all a great set, and would be fab for someone just starting out with stamping.
I started out by swatching both the plates on paper, using the red special polish. The red is a true red and stamps perfectly. I had no trouble picking any of the images up and transfering them - on paper or on my nails. Even the plate number stamps! Each image is crisp and clear.
I then tried the polish over some different colours. I chose red because it is a notoriously hard colour to stamp over a dark base, and unfortunately this was the MoYou red's only downfall. You can barely see it over the black, but over blue and silver it's perfect.
And then of course I had to use it in a manicure! I paired the red with white and some dots for a cute mani. The red special polish isn't too thick that you can't use it for a base, which saves trouble trying to match stamping polish to normal polish.
I was offered the change to try out some stamping plates and special polish from MoYou Nails, a UK nail art brand who offer stamping plates, special polishes and everything a nail art novice or expert, or anywhere in between, could ask for! They sent me plates 101 and 105, a stamper and scraper and their red special polish to try.
The plates I chose both have 6 small images on them - 101 has owls and eyes, and 105 has hearts and bows (we all know how I feel about owls! <3) The plates are round, come with a blue protective film to stop them getting scratched in transit, and a backing so the edges aren't sharp. The stamper is red and firm, and it worked straight out of the packet with just a wipe over with some acetone - no need to "prime". The scraper is plastic, which I prefer as it wont scratch the plate. All in all a great set, and would be fab for someone just starting out with stamping.
I then tried the polish over some different colours. I chose red because it is a notoriously hard colour to stamp over a dark base, and unfortunately this was the MoYou red's only downfall. You can barely see it over the black, but over blue and silver it's perfect.
And then of course I had to use it in a manicure! I paired the red with white and some dots for a cute mani. The red special polish isn't too thick that you can't use it for a base, which saves trouble trying to match stamping polish to normal polish.
All in all, these are great, high quality stamping plates, and I'm very pleased to add them to my collection. Everything featured in this post can be purchased from www.MoYouNails.com, and they have a huge range of plates with individual and full nail images, special polishes and nail art tools. I've got my eye on some of the XL plates...
Also, keep an eye on MoYou Nail's Facebook page for updates, special offers and competitions! And I'm planning a special manicure with the owl plate soon, so look out for that too!
Hx
The product featured was a PR sample provided to me for free for review consideration. All opinions expressed are my own and 100% honest. Please see my disclaimer in the tab above for further details.
Thursday, 22 May 2014
GOT Polish? Blingggg!
Hi!
This week's GOT polish theme is bling! Now, I can bling it up as much as the next glitter addict, but I went for a bit of subtlety. Just a bit mind. I used Rimmel Turquoise Sky as the base, with Maybelline Knitted Gold and Sinful Colors Paris on the accent nail. I stamped two nails with Cheeky XL C and Barry M Gold Foil, and then finished with some small square studs from Born Pretty Store.
I actually really love this, and might try something similar when my toes need changing in a few days...I've only ever stamped my toes once and it was a disaster, so maybe this time it'll make it to the blog! I've not posted my toesies in a while...
Hx
This week's GOT polish theme is bling! Now, I can bling it up as much as the next glitter addict, but I went for a bit of subtlety. Just a bit mind. I used Rimmel Turquoise Sky as the base, with Maybelline Knitted Gold and Sinful Colors Paris on the accent nail. I stamped two nails with Cheeky XL C and Barry M Gold Foil, and then finished with some small square studs from Born Pretty Store.
I actually really love this, and might try something similar when my toes need changing in a few days...I've only ever stamped my toes once and it was a disaster, so maybe this time it'll make it to the blog! I've not posted my toesies in a while...
Hx
Labels:
Barry M,
barry m gold foil,
cheeky,
glitter,
gold,
Golden Oldie Thursday,
GOT polish,
Maybelline,
Rimmel,
stamping,
studs,
turquoise
Monday, 19 May 2014
Lacey nudes...
...and if that title doesn't attract the spam bots I don't know what will. Anyway...
Hi!
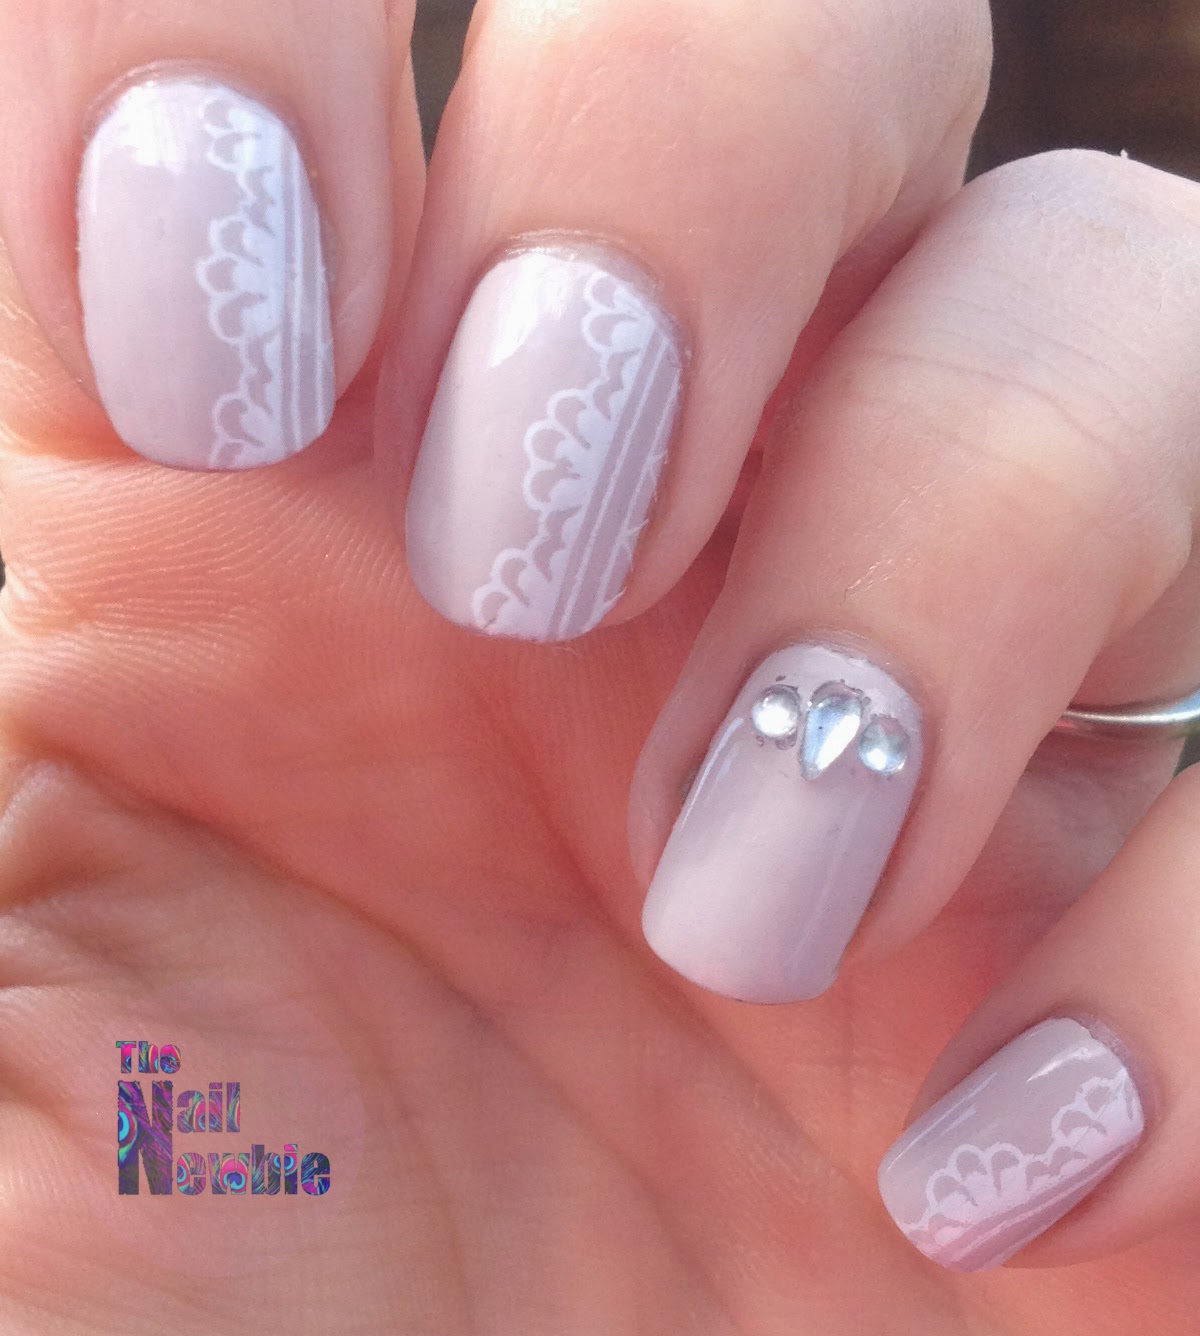
I've decided a good way to embrace my nubs is to get out all of the stamping plates that I might have dismissed lately because the images were too small, or not suited to an almond shape, and make use of them! While I could make the images from the Pueen Love Elements set fit, I think this design (from Pueen 29) used in this way is more suited to a square shape. I only used half of the image, and placed it down the side of my nail, accenting with some rhinestones (which I couldn't have applied any wonkier if I tried). The base is Nails Inc Sao paulo Streets, which was a freebie from the month's InStyle mag and a lovely cool toned nude.
Did you pick up any of the InStyle freebies this time around? This is the only one which called to me and it is nice and the formula was good too.
Hx
Hi!
I've decided a good way to embrace my nubs is to get out all of the stamping plates that I might have dismissed lately because the images were too small, or not suited to an almond shape, and make use of them! While I could make the images from the Pueen Love Elements set fit, I think this design (from Pueen 29) used in this way is more suited to a square shape. I only used half of the image, and placed it down the side of my nail, accenting with some rhinestones (which I couldn't have applied any wonkier if I tried). The base is Nails Inc Sao paulo Streets, which was a freebie from the month's InStyle mag and a lovely cool toned nude.
Did you pick up any of the InStyle freebies this time around? This is the only one which called to me and it is nice and the formula was good too.
Hx
Sunday, 18 May 2014
Without the dark, we'd never see the stars...
Hi
Late post from me tonight, today has been a horrible ending to a pretty shitty week so I'll keep this short (like my stupid nails). Today;s Adventures in Stamping theme was to use a pink base but instead of a pink creme I chose some simple stars over this glittery raspberry pink texture polish, Luna by Rimmel from their Space Dust range. To be honest, while this is textured the sparkle is so much nicer with a topcoat, but just one thin layer and you don't lose the finish completely. I stamped some simple silver stars with Cheeky CH5 and Barry M Silver Foil.
Subscribe to:
Posts (Atom)