Showing posts with label white. Show all posts

Saturday, 11 October 2014

Halloweenie with Charlie's Nail Art!

Hi!

We're well and truly into Autumn now, with this week seeing me digging out the boys woolly hats to replace their sun ones (and me putting on my winter coat for the first time this year resulting in a spider crawling out of the hood and making it's way down my face...eek!). I know to many of you, Halloween nails should be reserved for a few days running up to the event, but I received these glow in the dark gems from Charlie's Nail Art to review, and they just screamed halloween to me! Feeling inspired, I created these slimy nails using the gems as eyes and lumps of slime (which delighted my 7 year old!). The gems were really versatile; I turned them into eyeballs just with a dot of black polish, and they even glowed through a green jelly polish (Sinful Colors Irish Green). They need a little charge in sunlight to glow, but I was surprised that they actually needed very little and were glowing straight out of the envelope! They cost just 99p for 100 and come in white or pink.


Have these inspired you for halloween? Check out Charlie's Nail Art for more spooky nail art goodies, I'm particularly loving the cute pumpkin decals!

Hx
Pin It

Monday, 1 September 2014

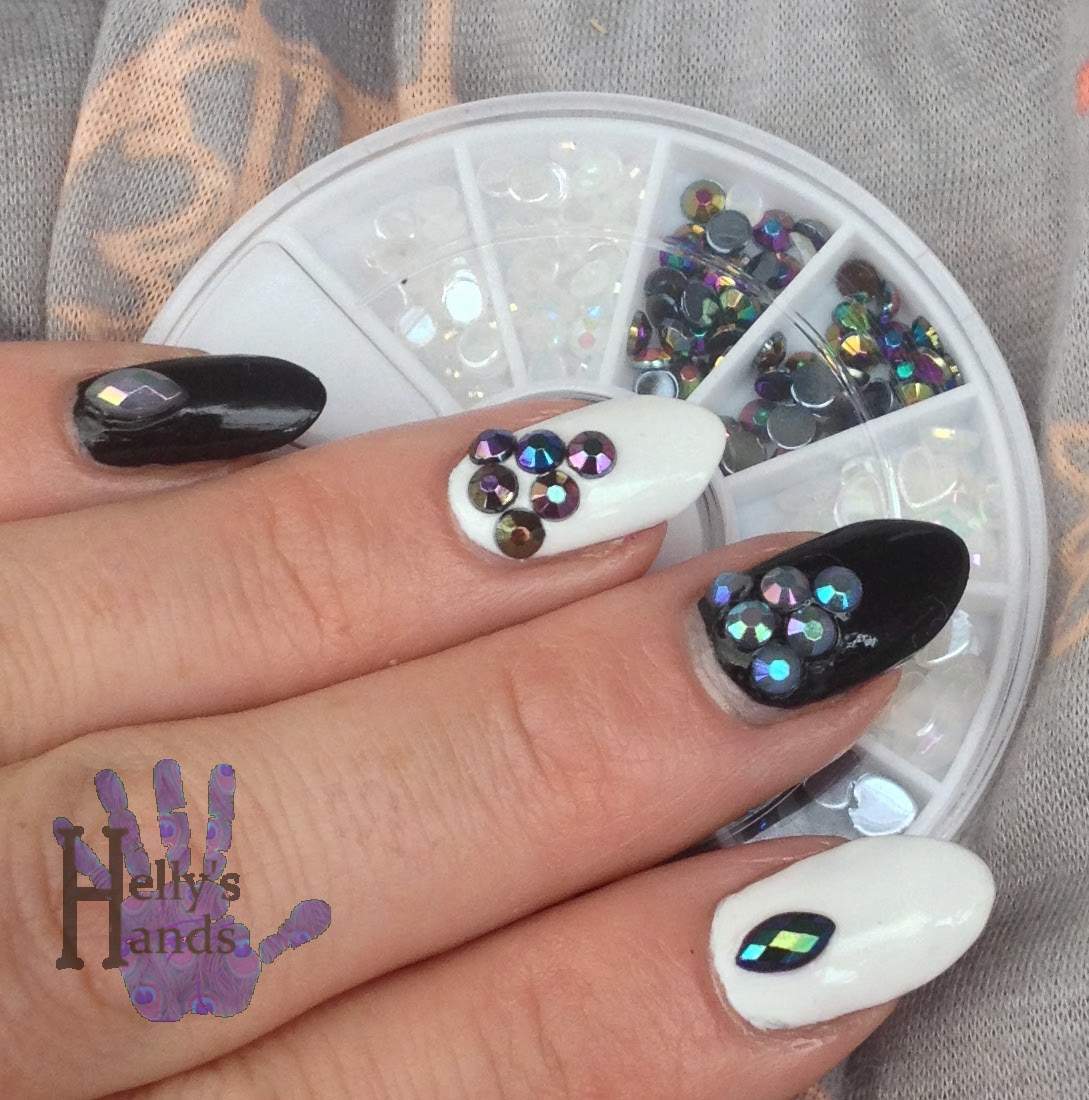
Black and white and bling: Born Pretty Store Black and White Rhinestone review

Hi!

Today I have for you some simple blinged up monochrome nails thanks to Born Pretty Store! I chose these black and white pearlescent rhinestones from their huge range because they looked just a bit different to the other studs and gems I have in my nail art stash. They come in a wheel with circle, heart and elliptic shapes of each colour and there are 200 in total. As with most rhinestones they're easy to apply - I simply used an old eyeliner pencil to pick them up and popped them into my topcoat. I didn't use topcoat over them, as I find this alters the shape a little, but they lasted a day without accident! You could go very simple or very extravagant with these, they're a really versatile nail art gem!


These are just $2.80 with free shipping worldwide, but I warn you if you go to the Born Pretty website be prepared to lose a couple of hours as it's a veritable Aladdin's cave of nail and beauty goodies. They ship from China, but these came within about 10 days and were well packaged. You can also get a further 10% off your order by using my code NBL91.


I have a few more things to share with you over the next few days too :)

Hx

The item featured was provided to me for free in exchange for a review. My opinions are 100% my own and always honest.
Pin It

Sunday, 1 June 2014

When I met you in the summer...

Hi!

Today's Adventures in Stamping Sunday theme was summer nails, and I decided to go a bit beachy. I used to live in Cornwall and it was a few minutes drive in any direction to get to the most beautiful beaches, but now I'm pretty landlocked and I miss it. So what better way than to bring the beach to my nails! I used sooooooo many polishes for this manicure - starting with one coat of Barry Greenberry Gelly and then two of Seventeen Turquoise from their new Juicy Neon collection. To me, they don't seem very neon, but pretty summer polishes none the less. I then added a dabbed on coat of a blue glitter by Technic called Mermaid before letting that all dry with a coat of Poshe. The accent nail is Models Own Bora Bora and ELF Golden Goddess. Once that was ready I stamped seashells from Cheeky plate CH 38 in Konad white on the accent nail, and Barry M Gold Foil on the blue nails. In hinsight, I should have used white, or maybe blue, on the "sea" nails, as the stamping is hard to make out. I tehn added more Bora Bora and Golden Goddess to imitate sandy tips. It is really pretty, even though the stamping errs on the subtle side!


Pretty and sparkly summer nails!

I have a very exciting post scheduled for tomorrow morning, and you'll definitely want to check it out so see you soon!

Hx
Pin It

Friday, 30 May 2014

GOT Polish? Lilac!

Hi!

Guess who forgot to post their GOT polish mani yesterday? *Raises hand* So here it is, a wee bit late! I hope it was worth the wait, because I used an absolutely stunning polish here. Emily de Molly Simplicity is a lilac cream prolish stuffed with white matte glitters that just float perfectly in the crelly base. There's no fishing for glitters, no dragging, perfect opacity in two coats and it's smooth as glass just with one coat of topcoat (Poshe is my go-to). I teamed it with another Australian polish, but this time what I believe is a drugstore brand, Face of Australia Castle on a Cloud is a beautiful pale lilac with pretty shimmer. Another great two coater, and I topped it with some bubbly stamping to match the glitter in Simplicity and for a dreamy feel.


Worth the wait? I'm an idiot sometimes!

Hx


Pin It

Monday, 26 May 2014

Dotty Bows with MoYou Nails

Hi!

I was offered the change to try out some stamping plates and special polish from MoYou Nails, a UK nail art brand who offer stamping plates, special polishes and everything a nail art novice or expert, or anywhere in between, could ask for! They sent me plates 101 and 105, a stamper and scraper and their red special polish to try.

The plates I chose both have 6 small images on them - 101 has owls and eyes, and 105 has hearts and bows (we all know how I feel about owls! <3) The plates are round, come with a blue protective film to stop them getting scratched in transit, and a backing so the edges aren't sharp. The stamper is red and firm, and it worked straight out of the packet with just a wipe over with some acetone - no need to "prime". The scraper is plastic, which I prefer as it wont scratch the plate. All in all a great set, and would be fab for someone just starting out with stamping.


I started out by swatching both the plates on paper, using the red special polish. The red is a true red and stamps perfectly. I had no trouble picking any of the images up and transfering them - on paper or on my nails. Even the plate number stamps! Each image is crisp and clear.


I then tried the polish over some different colours. I chose red because it is a notoriously hard colour to stamp over a dark base, and unfortunately this was the MoYou red's only downfall. You can barely see it over the black, but over blue and silver it's perfect.


And then of course I had to use it in a manicure! I paired the red with white and some dots for a cute mani. The red special polish isn't too thick that you can't use it for a base, which saves trouble trying to match stamping polish to normal polish.


All in all, these are great, high quality stamping plates, and I'm very pleased to add them to my collection. Everything featured in this post can be purchased from www.MoYouNails.com, and they have a huge range of plates with individual and full nail images, special polishes and nail art tools. I've got my eye on some of the XL plates...

Also, keep an eye on MoYou Nail's Facebook page for updates, special offers and competitions! And I'm planning a special manicure with the owl plate soon, so look out for that too!

Hx

The product featured was a PR sample provided to me for free for review consideration. All opinions expressed are my own and 100% honest. Please see my disclaimer in the tab above for further details.
Pin It

Monday, 19 May 2014

Lacey nudes...

...and if that title doesn't attract the spam bots I don't know what will. Anyway...

Hi!

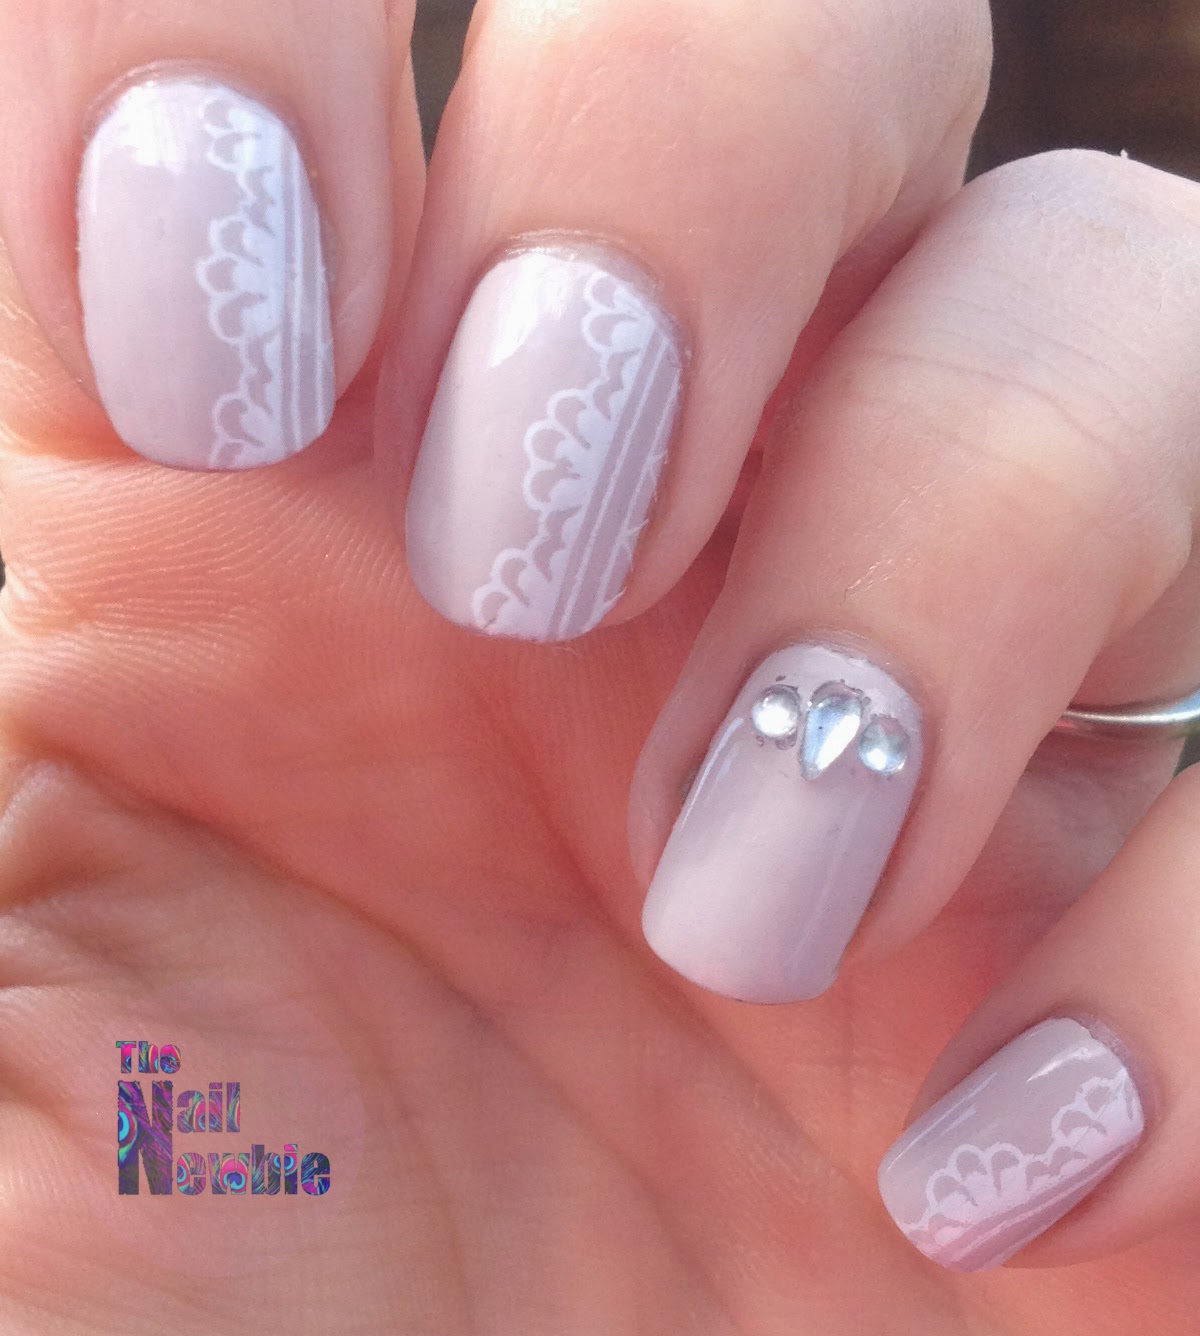
I've decided a good way to embrace my nubs is to get out all of the stamping plates that I might have dismissed lately because the images were too small, or not suited to an almond shape, and make use of them! While I could make the images from the Pueen Love Elements set fit, I think this design (from Pueen 29) used in this way is more suited to a square shape. I only used half of the image, and placed it down the side of my nail, accenting with some rhinestones (which I couldn't have applied any wonkier if I tried). The base is Nails Inc Sao paulo Streets, which was a freebie from the month's InStyle mag and a lovely cool toned nude.


Did you pick up any of the InStyle freebies this time around? This is the only one which called to me and it is nice and the formula was good too.

Hx
Pin It

Tuesday, 29 April 2014

Tri Polish Challenge April #5 - Hippy trippy brushstrokes

Hi!

Final pink, blue and yellow Tri Polish challenge, as it's the last Tuesday in April! I know I say this every month, but seriously, how? Anyway, for today's challenge I used some home-frankened sheer polishes in the vein of the OPI sheer tints. I kind of want the sheer tints, but I've heard bad things about the formula so decided to have a go at making my own! All in all, I was pleased with them although I think my blue could be a little more sheer. I'll get a post together on how I did it and their various uses when I've perfected them, but for today's mani I did a simple brushstroke base over two coats of Crabtree & Evelyn Snowdrop. Once that was dry I stamped over it with Konad white and MoYou XL Pro 10. Quite hippy trippy but I love it!


Soft and delicate...and slightly out of focus! Sorry about that!

Next month's colours are purple, red and green. I'm in two minds whether to do the whole month, I'm feeling guilty about my untried again! Maybe I'll do one or two, we'll see!

Hx


Pin It

Thursday, 24 April 2014

GOT Polish? Totally Tropical!

Hi!

Today's Golden Oldie theme was tropical, and I thought I'd try my hand at a little stamping decal again! My golden oldies were China Glaze Peachy Keen and Color Club Poptastic (should have used Flip Flop Fantasy really!) I also used Milani Gold Gems and Sinful Colors Paris for a little glitter gradient. Don't look too closely at the decal, it folded over at the edge and smeared a little bit. I will perfect them one day!


Fits the tropical bill, no? I loved the gradient despite the little decal accident! I really can't wait for summer, I can't stop cracking out the neons! My pedi is even neon in readyness for real flip flops!

Hx


Pin It

Tuesday, 22 April 2014

Tri-Polish Challenge April #3 - Fade to Neon

Hi!

I'm a twit. I thought I was super organised and had this post scheduled for 8am, but I didn't so you're getting it at 8pm instead! For this week's TPC I went with neon and white gradients using all Color Club polishes, from the Poptastic collection - Warhol (pink), Chelsea Girl (blue), and Almost Famous (yellow). I did the gradients and had intended to either stamp or dot over them, but decided I liked them plain. I did feel like it was missing something though!


I can finally show my thumb again after a nasty break a while ago, as it's finally catching up again! Yay!

Hx


Pin It

Tuesday, 8 April 2014

Tri Polish Challenge April #2 - Barmy Blue and Neon too

Hi!

This week's TPC couldn't be more different to last weeks - in contrast to soft, pastel and girly I have gone for neon, sharp edges and eyesearing! I started with a base of white and then sponged a gradient with Rimmel Barmy Blue and Models Own Bubblegum. Because they're both quite deep colours I had to sponge on a few more layers than usual and so mu sponge started sticking to my nails. So I decided to cover it up with a good old bit of stamping, with Pueen 52 and Konad White.


I think I should have added a navy blue at the cuticle end of my nail, as I wanted the base a bit darker, but overall I was pleased with these :) I think I was all pastelled out after last week! And I must just put a good word in for these new Pueen plates, so far they are flawless. Good stuff.

Hx


Pin It

Sunday, 6 April 2014

Unicorns and lilac clouds

Hi!

This weeks adventures in stamping theme was pastel, and because I've done a couple of pastel manicures this week I went for something a little bit different. I started with a base of Chubby Owl Polish Blitzed Unicornz II, a white crelly base with multi-coloured matte and shiny pastel glitter. It's a really complex polish, but there's pastel pink, lilac, mint, pale blue and gold bits in there, really pretty! I used to coats over white and then stamped swirly clouds in Sally Hansen Lively Lilac with Nailz Craze NC02. Then, because it just wasn't girly enough, I added some flatback pearls too, picking up some of the colours of the glitter.


I really liked this manicure, although girly is definitely not me! Using the pastel glitter instead of a solid pastel colour was a good choice, although now I think I'm all pastelled out for a while!

Hx
Pin It

Thursday, 3 April 2014

GOT Polish - Pastels!

Hi!

It's been a bit of a Barry M fest on the blog this week! I'm continuing the theme with today's Golden Oldie Thursday challenge which was pastels. I used Barry's first textured range (which I bought and loved but only used once...) in skittles and then stamped sweeties, ice cream and cake over the top. Perfect springy pastels! The colours pointer to pinkie are Ridley Road, Kingsland Road, Atlantic Road and Station Road. I love the textures on these, they're not too much that they're too rough but they're bumpy enough to notice. They remind me of the old woodchip wallpaper I had on my bedroom wall as a teenager!


I do love a bit of a skittle anyway, so it was no surprise that I loved this mani :) Next week's GOT theme is coral, and lord knows I have a lot of those!

Hx


Pin It